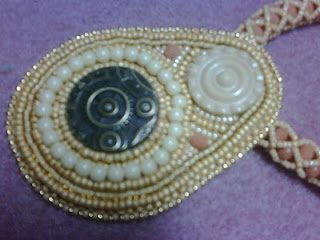
I went a bit crazy and bought a whole pile of fire-polished crystals recently, from Over the Rainbow, who were having a sale over May [www.polymerclay.com.au]. I wanted to do a couple more of the diamond net ropes (I now have enough crystals to do more than a couple!). These 'latte' crystals went very nicely with the seed beads. I matched them with biege size 15/o seed beads and galvanised gold size 11/o seed beads in the rope. They work really well together. The clasp is an antique glass button with a simple loop at the other end.
The pendant had to be designed to go with the rope! I used an antique glass button and a new steampunk style metal button as the focals, and then did some bead embroidery around them. I rather like the way this one turned out. Instead of doing a loop at the top of the pendant for a bail, I did the loop going down the back of the pendant, so that it hangs slightly up over the rope. I wish I had figured that one out earlier, I would have used it on another couple of earlier projects. I really like the galvanised-finish beads. I have some in gold and silver and they are both nice. The matte metallic finish is interesting mixed in with other bead finishes. It's nice to be able to use some of the beads and so on in the stash too. I doubt very much whether I could claim this one as Steampunk - it's the wrong colours for the Victorian era, which Steampunk is based on. Still, the 'industrial' button works nicely with the other elements in the pendant.
 I went to the Melbourne Bead and Gem Show on the weekend with some friends [www.beadandgemshow.com.au]. As usual we had fun rummaging through all the beads and buying stuff. I was relatively restrained this year, at least partly because the ATM wouldn't give me any money first thing in the morning! I purchased some velvet display busts from Feeling Inspired, including one large one to use when working. I'm finding that things will actually sit on it - these ones already have an artificial suede backing glued on, which is probably why they stick to the velvet, I doubt if it will work all the time. Even so, there is enough padding under the fabric that it will be easy to pin things to it to hold them in place. It should prove useful in designing pieces where I need to plan how things will drape. As you can see, my real Steampunk project is progressing slowly. I got some supplies for it at the Show, so will move ahead with it now.


